Saturday, December 12, 2020

Dragonfly Garden - Scrap Layout.

Hello Crafters

Wanted to share with you a quick simply layout using one of our new stamp sets that will be available in January.  This is a very versatile set that can be used for many occasions. Who would of thought to use it for a Fishing layout. This is our 5 year old Grandson Freddy, who absolutely loves fishing with his Dad. He landed this fish with minimal help from his Dad, and then offered to help his Dad fish.

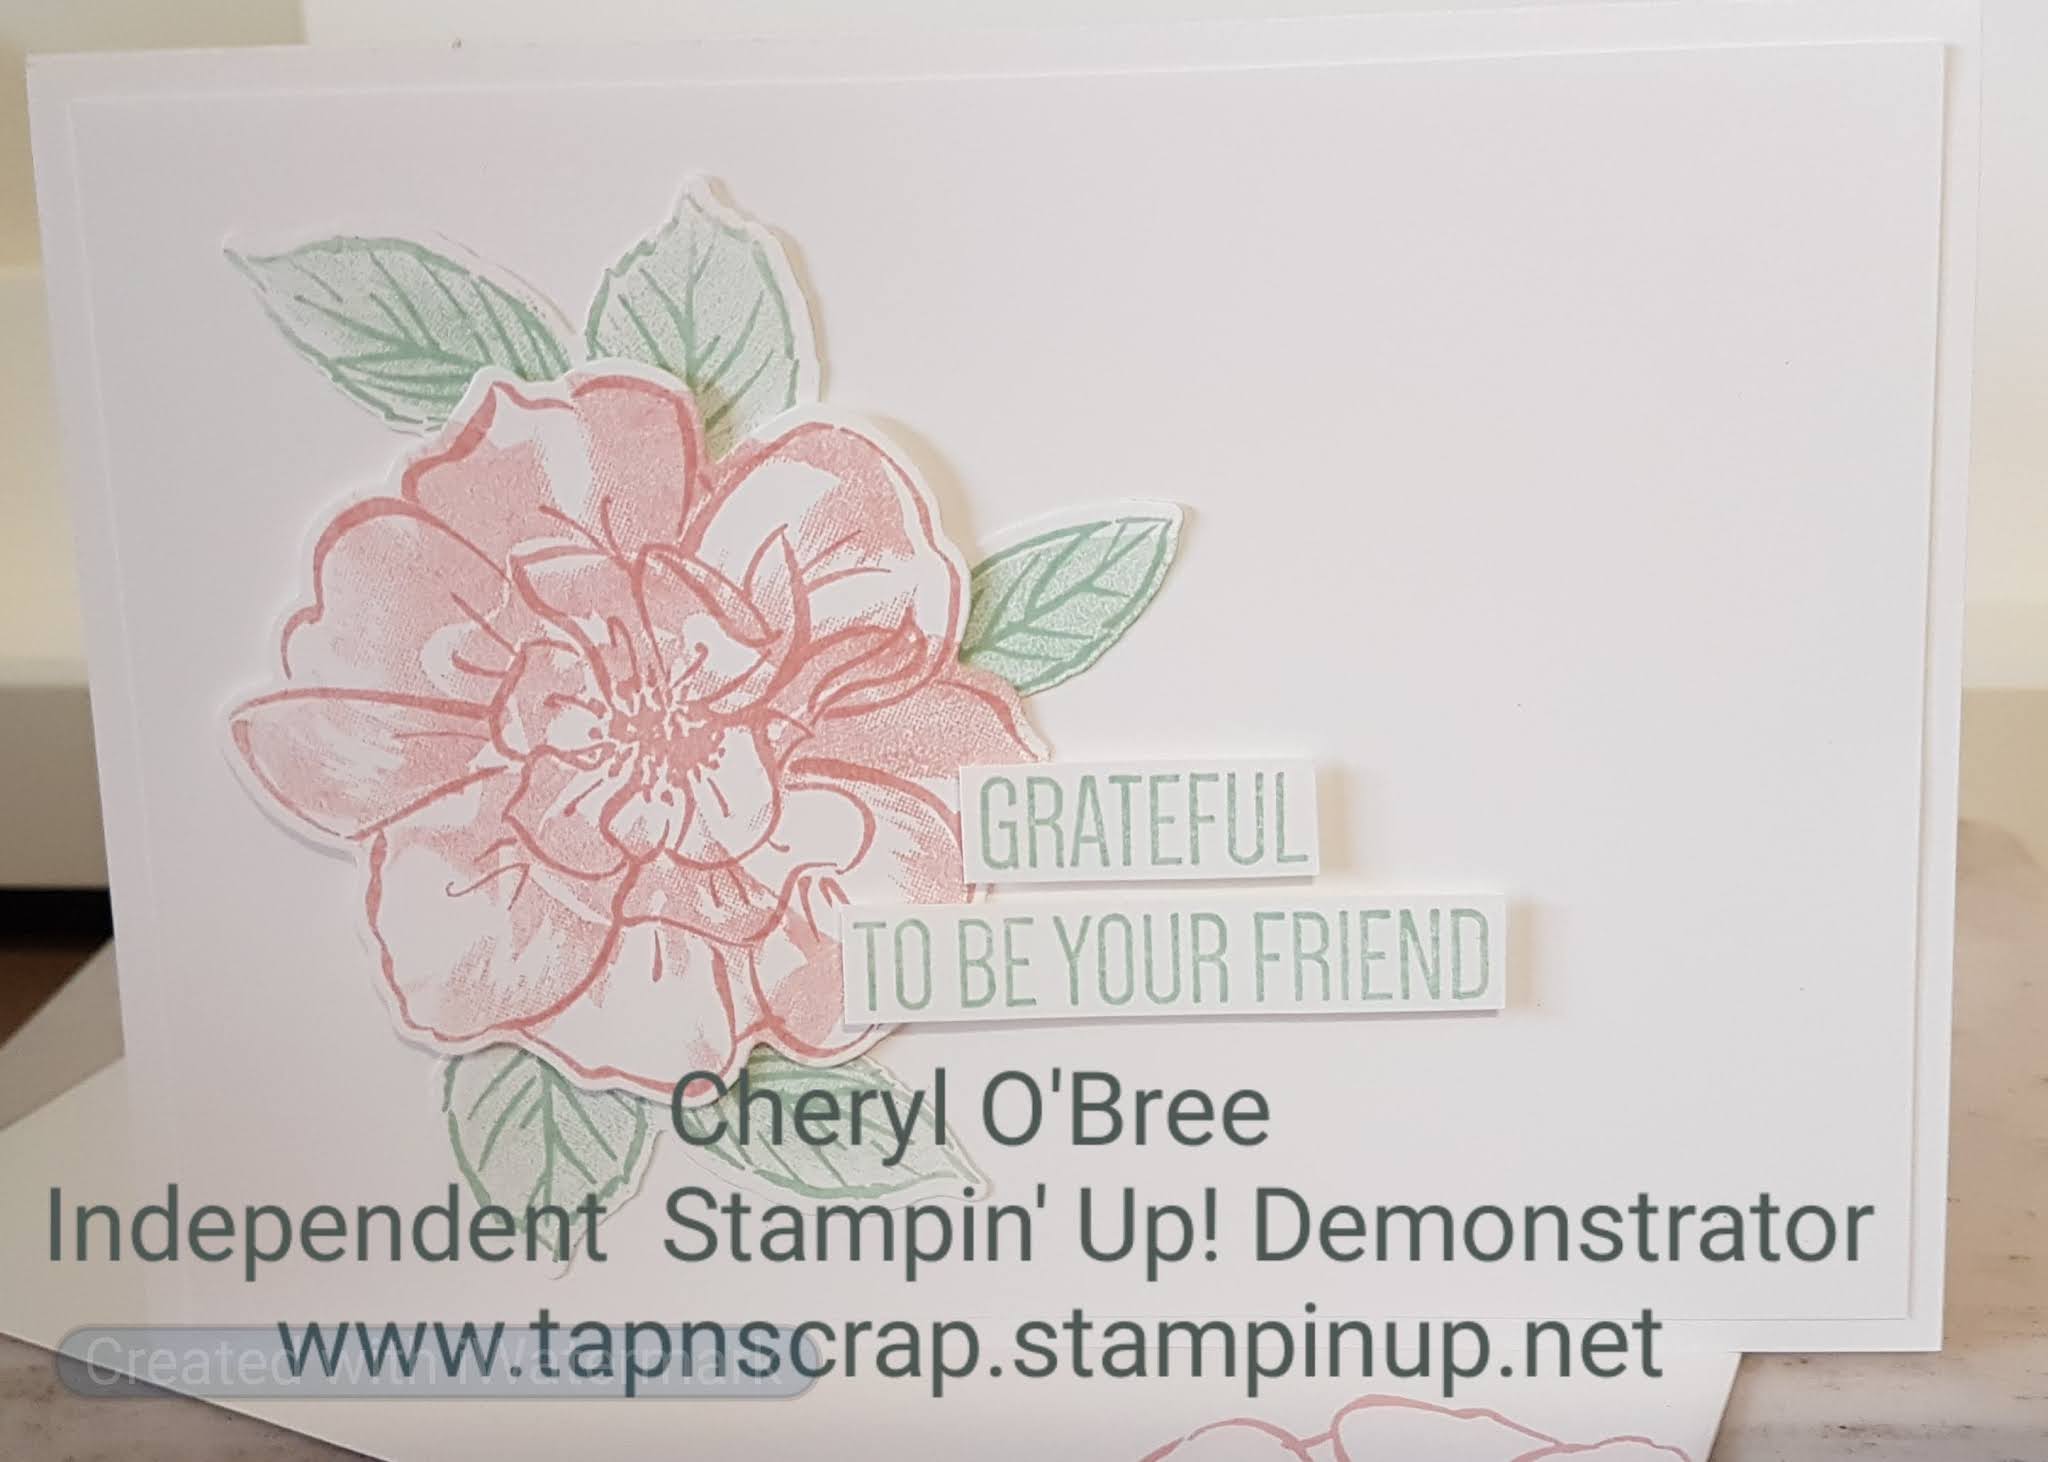
Stamp Set - Dragonfly Garden 154411

Ink - Pumpkin Pie, Memento Black, Craft Whisper White

Card Stock - Whisper White, Vellum,  12 x 12 Basic Black and Pumpkin Pie

Accessories - Playful Alphabet, Dragonfly punch, Foam adhesive sheets

I layered both Basic Black and the Pumpkin Pie 12 x 12 sheets of card stock. Cutting the Basic Black down by 1' on 2 sides. Framed the photos with the same coloured card stock. Stamped the back ground using the Craft Whisper White Ink and the small cluster of dragon flies image to create back ground. Stamped the dragon flies on both Whisper White card stock and vellum card stock, then punched them out. Punched out a few mini dragon flies. For the Heading, I stamped the wings image onto Whisper White Card stock, then added the Foam adhesive sheet to the back, then then cut out the letters I needed using the Playful Alphabet. Both these products are a must have, and super easy to use. They add dimension to your page and make your heading stand out.

Thanks for stopping by....

Keep Stampin'

Cheryl😊🎣🐟


Wednesday, November 11, 2020

Background Technique with Blender Pens and Alcohol

 What a great technique I have just learnt from my good friend Kristy Moloney. I'm unsure what the correct title it should hold, so I have just named it Background Technique with Blender Pens and Alcohol.

You will want to give this a go, so easy. My 7 y.o. grand-daughter Ivy, sat beside me and watched, and the next minute she was creating away herself, picked her own colours. To be truthful hers was better than mine.😂

What you will need to gather is - Isopropyl alcohol 500ml $30- or 125ml $10- at Bunnings in Australia.    A small paint brush, or your aqua painter. Small egg cup for alcohol, Spritzing tool (Stampin' Up! old one or tool that blows air. Check out your Chemist or Hardware Store)    

Stampin' Up! Vellum Card Stock and Window sheet. Your choice of colour in the dark Blender Pens.                                                                 

https://youtu.be/ojJm7XOO5Ps 

Checkout my video on this technique.

Here are the cards I made with the finished product.

This card is using the window sheets, its very bright and vibrant, and a sneak peak at an up and coming stamp set.
Vellum used this time, and I made it look like a window. Love this Quite Curvy set.
More sneak peaks, this is using the window sheet again.
Another vellum background.

Vellum was also used in this card.

Products used in these cards are as follows - 

  • Birds and Branches Bundle 154107
  • Quite Curvy Stamp set 154430
  • Curvy Dies 154319
  • Layering Circles Dies 151770
  • Layering Square Dies 151772
  • Layering Oval Dies 151771
  • Stitched Rectangle Dies151820
  • Card Stock - Whisper White 106549, Shimmer White 121717, Blackberry Bliss 133682, Cajun Craze 121683, Mint Macaron 138344, Pretty Peacock 150886, Blushing Bride 131287, Shaded Spruce 147006.
  • Blender Pens in dark shades
  • Embossing Folder Subtle 3D 151775
  • Rhinestones 144220

Would love to see some of your own creations when you have tried this technique out.

Happy Stampin'

Cheryl🙋🌻


Wednesday, October 28, 2020

Curvy Christmas Sneak Peak - Scrapbook Layout

 Hello Stampers,

Just wanted to share with you a sneak peak of a few amazing new products available in November.

Curvy Christmas 155364

Quite Curvy 154430

Curvy Dies 154319

Members of our Stampin' Up! Artisan Team created some amazing cards, and I took a couple of their ideas to create this Scrap Layout.

Stamps - Curvy Christmas

Card Stock - 12 x 12 Real Red, Garden Green, Whisper White

Ink - Daffodil Delight, Garden Green, Memento Black

Accessories - Embossing and Cutting Machine, Curvy Dies, So Saffron Blend, Well Said Dies, Adhesive sheets, gold twine and gold star embellishments.

 Keep Stampin'

 Cheryl 🎄

Tuesday, October 27, 2020

Celebrate Sunflowers - Casing the Stampin' Up! Catalogue


 Hello Stampers,

I thought I would share another casing the Stampin' Up! Catty. This lovely card above is from our catalogue, and I have simply taken the background idea to create my cards. I have shown you 3 ways you can do this from Beginner to Avid.

BEGINNERS CARD


I have turned the card around to a vertical card. I have a plain background, and whisper white card stock under the flower. I stamped my image and coloured it in using daubers and ink directly from the ink pad. I coloured the flower in the lighter colour first and then used a darker colour to give the flower more depth. It is coloured roughly, then I simply cut out the flower. I used my dies, but you can cut out with your snips. I stamped the leaves and sentiment and cut them all out. I used dimensionals to raise the flower up, and slipped the leaves underneath.

INTERMEDIATE CARD


To create this card I added stamping to the card base. Embossed the Whisper White piece of card stock behind the Sunflower with an embossing folder. The flower and leaves are the same. Then added some iridescent pearls and a different sentiment.

AVID CARD

Lastly this card has been stepped up with a couple of more layers and techniques. Front of card I embossed with an embossing folder, then I added a layer piece in the same colour and embossed it with a different embossing folder, and then cut out the bottom right hand corner with the Layering Circles.
I then layered the Whisper White piece and cut away the right lower hand corner as well. This gives an area for the Sunflower to sit with interest behind it. I then stamped and coloured the Sunflower and leaves the same, but I stamped an extra Sunflower and coloured it, but cut only the inner layer out and adhere it to the top of the full Sunflower. this then gives it a greatly dimensional look. Added the sentiment and the iridescent pearls.

All 3 cards are equally gorgeous, all by casing from the catalogue, just by changing colours, aspect of card. Give it ago and share with me your ideas. Post them on my Facebook page.

Stamp Set - Celebrating Sunflowers 152517
Card Stock - Balmy Blue 147007, Grey Granite 147008, Whisper White 106549
Ink - Memento Black 132708, Balmy Blue 147105, Grey Granite 147118, Mango Melody 147093
Accessories - Iridescent Pearls 153549, Greenery Embossing folders 152716, Dainty Diamonds Embossing folder 152702, Scripty Embossing Folder 149634, Layered Circles Dies 151770


Monday, October 26, 2020

World Card Making Day - Embossing Paste

 Hi Stampers,

I joined into group on World Card making Day and I present some ideas on the Stampin' Up! Embossing Paste. So I have now made these videos public, so you can check them out.

This sample is using the shimmer Embossing Paste using a stencil for the Background.
I used the plain embossing paste here, and added some reinker to the paste to give it a little colour. I run card stock through a die to make a stencil, and applied the paste.
In this sample, I used the plain white embossing paste, using a stencil cover the whole Background. Then using reinker or ink pad, a blender pen or aqua painter coloured in selected areas of the paste. You can also you a Stampin' Write marker. Here is the link to the video

 My next sample are on Scrap booking layouts.

I have applied some shimmer embossing paste with a stencil in the Background and made my own stencil with a butterfly punch to apply some coloured embossing paste.

 In this layout I added a large amount of plain white embossing paste to my silicon mat, then added a few drops of reinker, then picked up the paste with one of the tools and applied it to my page by troweling from left to right, nothing fancy. I did need to allowed a good 1/2 hour to dry, as it was quite thick.


Here is the link to my video

Hope you have ago at using this amazing product, which adds texture to your cards and Scrap booking layouts.

Here are the products I used in these samples.

Stamp Set - Tasteful Touches 152562, Seriously the  Best 151712, Birds & Branches 152570

Card Stock - Petal Pink 147009, Early Espresso 121686, Basic Grey 121689, Whisper White 106549, 

Soft Suede 119982, Grey Granite147008, Smokey Slate 131291 

Designer Series Paper - In Good Taste 152494

Ink - Petal Pink 147108, Early Espress0 147114, Basic Grey 149165, Soft Suede 147115, Grey Granite 147118, Smokey Slate 147113

Accessories - Embossing Paste White 141979, Shimmer Embossing Paste 145645, Palette Knives 142808, Basic Pattern Decorative Mask stencils 150697, Poppy Moments Dies 153823, Silicon mat 127853

Please subscribe to my youtube channel if you like these videos.

Happy Stampin'

Cheryl🌺


Friday, October 23, 2020

Casing the Stampin' Up! Catalogue 2020

 Hi Stampers,

Just wanted to share with you some cards I made through casing our amazing Stampin' Up! catalogue. What a great way to use our catalogue, not only for our purchases but for our motivator and inspiration to create. I have chosen the To a Wild Rose on page 15, to get my idea. I have used the same layout, but changed up the colours and layers. I have created a Beginners, Intermediate and Avid card all from the one idea.

This is the card I am casing bottom left hand corner.

My first card is for the Beginner or the stamper who loves simple. I have used Whisper White Card Stock, and added just 2 inks, Blushing Bride and Mint Macaron. You can either use the Wild Rose dies to cut out or your snips.

Just stepped it up a little, by adding the Scripting embossing folder in the back ground, and silver heat embossing to the flower and and sentiments. Stepping it up from a 2 step stamp to a 3 step stamp.

For the avid stamper, I added a little more layering with sponging, spritzing, more heat embossing and embellishments.

What a great way to use your catalogue, so many amazing ideas without to much thinking. The biggest decision to make is which card to case.

Products I have used -

Stamp Set - To a Wild Rose 149452

Card Base :- Whisper White 8 1/4"  x 5 3/4" , 1st Layer and insert 5 1/2" x 3 7/8" , and enough card stock for stamping. This is what I used for all 3 cards, then added 1 piece of W/W card for the 3rd card measuring 4" x 3". 

The Inks used Blushing Bride 131172, Mint Macaron 138326, Rich Razzleberry 147091, Blackberry Bliss 147092, and Versa Mark 102283.

Accessories -  Wild Rose Dies 149547, Stampin' Cut Embossing Machine 149653, Silver Embossing powder 109131, Heat Tool 129056, Tasteful Textile Embossing Folder 152718,  Scripty Embossing Folder 149634, Elegant Faceted Gems 152464

You can purchase any of these products form my online store 

Checkout my tutorial and Subscribe to my youtube channel.

Hope you enjoy the cards,

Happy Stampin'

Cheryl


Saturday, September 5, 2020

Stampin' Cut & Embossing Machine

Are you in the market for a new die cutting machine, if so, this one is for you.
  •  It is compact 
  • Great for storage and taking with you 
  • Easy rotating handle.
  • Rubber feet securely grips work surface
  • Portable for on the go crafting
  • Comfortable carry handle
  • Easy to learn and simply to use
  • Sleek clean design looks great in any craft space
  • all plates you need to get started with are included

    Contact me if you would like anymore information.

Keep Stampin'

Cheryl 😊

Friday, September 4, 2020

Triple Cube Card - Extra

 Loved this card so much I thought I would share another one that I have just finished. This one if for my wonderful Father, for Father's day.

Stamp Set - Rooted in Nature, Well Said

Card Stock - Basic Grey, Granite Grey, Early Espresso and Whisper White. DSP In Good Taste

Ink - Granite Grey, Soft Suede

Accessories - Well Written dies

I distressed around the layering card stock go give a little more dimension.

Picture tutorial on previous post.


I added 2whisper white panels to the back of card so that I could write on. 2 x 4 3/4" x 1 3/4"

Very happy with the end product, will be making more of these. Hope you give it ago.


Keep Stampin'

Cheryl😊

Thursday, September 3, 2020

Triple Cube Card - Picture Tutorial

 Hello Stampers,

I been looking for a easy but a 3 dimensional card. Looking through Splitcoaststampers site I saw this little card. Here is the link to there's -. https://www.splitcoaststampers.com/resources/tutorials/triplecubecard/

I have followed this, but have changed the colours and the card size just a little to suit Australian A4 card stock.

Stamp Set -Zany Zebras 

Card Stock - Magenta Madness, Mango Melody, Whisper White and DSP Artistry Bloom

Ink - Magenta Madness, Mango Melody, Memento Black

Accessories - Simply Scored, tombow glue, punches

What I used - 8 1/4" x 8" Mango Melody card Stock

                       6 x 1 3/4" x 1 3/4" squares in Magenta Madness

                       6 x 1 1/2" x 1 1/2" squares in DSP Artistry Blooms

                       4 x 1 3/4" x 1 3/4" squares in DSP Artistry Blooms

                       1 x 2 1/4" x 7/8" magenta Madness

                       whisper white for the strips 1/2" x 1 3/4" and fold in half.

Whisper White for stamping.

Follow along with the pictures and you will be able to create one of these beauty's as well.


 This is the completed card.

Your main colour of card stock (Mango Melody) 8 1/4" x 8". with the 8 1/4" to the top of your simply scored - score @ 2, 4, 6, 8.

Turn and cut @ 4", 6". 

The 3 pieces to create card base. 2 x 2" x 8 1/4" and 1 x 4" x 8 1/4"

Cut 6 squares with your 2nd choice of colour (Magenta Madness)  1 3/4" x 1 3/4" and 1 piece for sentiment 2 1/4" x 7/8"
Cut 4 squares from your chosen DSP (Artistry Bloom) 1 3/4" x 1 3/4"

then cut 6 squares from the same DSP 1 1/2" x 1 1/2" 

 
Cut 2 pieces from scrap whisper white measuring 1/2" x 1 3/4" and fold in half
Layer your 6 DSP 1 1/2" pieces onto your Card Stock 1 13/4"

On the card base piece, you burnish on fold lines and snip the ends on the 1/4" end, as show in above pic.
Add tombow glue to the 1/4" flap and join  to card stock to make a cube.

then join the other two pieces to make cubes.

Three cubes complete.

Next mark an X on both small cubes on 1 side, and mark X to the bottom of your largest box.

Adhere smaller cubes to the largest one as above.
Both smaller cubes adhered to bottom of the largest cube.


Layer the 6 pieces of card stock and DSP pieces to the front of the cube.

Now adhere the 4,  1 3/4" squares to the inside of the of the largest cube at the top.

So far we should have this.


Fold card as above, as we are now going to adhere the sentiment in the middle of the card.

Adhering the 2 small pieces of whisper white 7/8" x 1 3/4" folded in half. to either side of the middle section.

which looks like this.

Then adding the Magenta Madness card stock piece 2 1/4" x 7/8" to the flaps. Picture looking down.

pic from front. Your basic card is finished, and you can decorate as you please.
I added a couple of sentiments and the cute little Zebra's to mine, make a little girls gorgeous birthday card. You can have any colour Zebra's right.😊


I hope you give this a try, and would love you to check back and see more ideas that I share with you. So follow my blog and don't miss any updates. 
 
Keep Stampin'

Cheryl😊


Stamping One Sheet Wonders

 Hello Stampers, This is a follow up from my August Online Class, with this fun technique. I absolutely love this type of stamping. Love to ...