Here's my grand-daughters card firstly.
Tutorial
Firstly cut 2 pieces of card stock 5 3/4" x length of A4 sheet.
Take 1 of those pieces and score at 4 1/8"Take the second piece of card stock that measures 5 3/4. X A4 and start to score from the beginning every 3/4" x5 times.
You will need to cut the excess off. So line the last score line up with the 4 1/8" mark. And then cut the rest off. This should measure the same as the the large area on the first piece. These create front and back of card.
You can make this card have fewer flips or more, you just to more or less scoring.
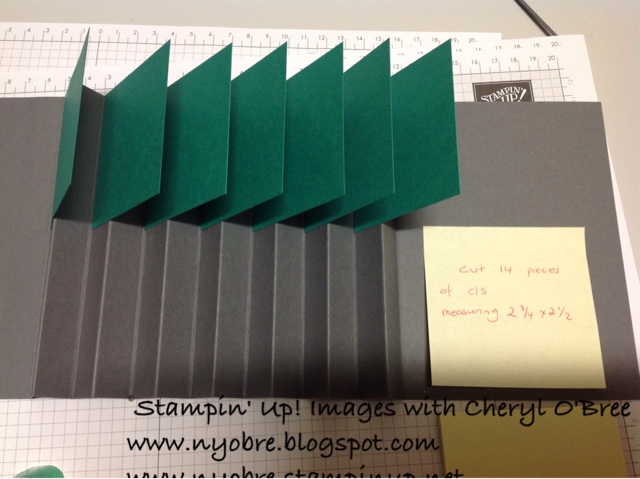
Stick the bottom pieces onto the backside of the mountain. (Oops I wrote right side on note for top it's the left sorry)
Cut 14 pieces of co-ordinating card stock.
Cut 3 pieces of card stock, 1 - Front, 1 - inside front, and 1 - inside back. I used coloured card stock for front and w/w for inside pieces. Cutting size 5 1/2". X 3 7/8"
Before putting on front cover, you will need to measure ribbon. Wrap it around you card, the ribbon keeps your card together.
Hope you understand these photos and you enjoy creating your own flip card. Please post some of your card and tag me into them so I can see them
Happy Stampin'
Cheryl


No comments:
Post a Comment